Thursday, December 30, 2010

New Year's Eve Activities For Families

Here are some New Year's Eve activities that our family has done over the years:

1) Slide show - I have done a Keynote presentation of family pictures for a few years now. It is fun to recap the year to an upbeat song. The songs I have used in the past are
- Our Lives by The Calling (I love the lyrics "these are the moments, these are the times - let's make the best out of our lives)
- Eye of the Tiger by Survivor
- All Star by Smash Mouth
- Time of Your Life by Green Day
This year the song is "Another One Bites the Dust" by Queen.

2) Pinata - We used to make the pinata out of a balloon and paper mache, but it has been simplified over the years. Last year we made a flat screen TV pinata out of an empty chocolate box and the  "wapper " was a remote control made out of a toothpaste box. This took maybe ten minutes to make. We weren't going to do a pinata - and then decided to do one.


3) Big bang at midnight - We have blown up balloons and popped them at midnight. The balloons have had a variety of stuff in them over the years - confetti, tinsel and pom poms. Confetti gives the best effect if you don't mind the clean up, the tinsel just comes out in a big lump, and the pom poms work good, but not as good as the confetti. One year we jumped on bubble wrap to make a big noise to ring in the new year.

Hopefully this gives you a few family friendly New Year's Eve ideas.

Tuesday, December 28, 2010

Don't Forget to Say THANK YOU - Christmas Thank You Card Ideas

I have always tried to get my daughter to give thank you cards after Christmas. Here are a few ideas I have done over the years.....

My favorite thank you idea is to take a picture after each present is opened on Christmas morning. Then I print the picture out, and have my daughter write a thank you message on the back of the picture.


I have taken pictures after Christmas morning as well. The year I did this, it was a good way to "remember" who gave what. We collected all the gifts and talked about each gift giver. This was the present my husband and I gave our daughter. I love the memories these pictures give too. This was a Digimon digivice that my daughter absolutely loved.


This was a thank you that my daughter did a while ago. It was a paper piecing project. She made about six of them so it did take some time - but it was time she loved and time I treasured doing something meaningful with her.


Last year we sent thank you pictures through the email, but it isn't the same. We will give out hard copy pictures or cards again this year as it is more meaningful.


Friday, December 24, 2010

A Little Different Christmas Wrapping Ideas

Here are a couple of different ways to wrap gifts for Christmas.


 I picked my Mom's name for Christmas. She is a rancher. I bought all little gifts and made a stocking out of an old pair of jeans. I added on a gingham ribbon and wrote on Merry Christmas with glitter glue. I am adding a little something for inside the pocket as well.


I made five boxes and five tags. I added the gifts, tied the tags on to each box and then stacked them with some tape in between to secure them together. I added a ribbon and - ta da! A cute idea for little gifts.

Thursday, December 23, 2010

Extreme Gift Wrapping - To Create Some Special Christmas Memories


Look how nice and innocent this gift looks. It is so "easy to unwrap" looking. Just untie the bow and rip off the paper, right? But wait! This present is from Auntie Sue.....What gives????

Ha, ha, ha, ha (mischievous laugh) Auntie Sue strikes again. This was actually my husbands idea and I was so excited to put it into action. I wish I could see the recipients face when he/she opens it.


I bought a package of zap straps and covered the gift with them, intertwining them so it will not be an easy present to open. This is one of my Christmas traditions - Extreme gift wrapping. Who will be the recipient next time????

A Gift Wrapping Idea For the Dogs

My daughter got a dog this year and of course he needs to have something to open on Christmas too. I wanted to be creative and have a present that he could open himself. He likes to tear apart things - but you wouldn't know that by looking at how innocent he looks....


I took some kraft paper and did a free hand drawing of a bone. I sewed along the lines, leaving a large opening. I erased the pencil lines, trimmed the paper and put in his gifts. Then I sewed up the hole. I decided to outline the bone with a felt and add a bow. All items in the bone are doggy ready (wrappings and tags off). I can't wait for him to open it!

Wednesday, December 22, 2010

8 1/2 x 11 Christmas Scrapbook Page With Gift Wrapping and Tag Idea

I have been reminiscing with past Christmases and thinking about gift wrapping that I liked. I love gift wrapping. I want the presents I wrap to be a little bit of eye candy. If it is not eye candy, then I try to wrap it in a difficult to get into way. My favorite gift wrapping idea was way back in 2004. I needed to post my scrapbooking pages to show you, as I didn't have a digital camera then.

Here is the scrapbook page that has the tag. I thought this was a cute primitive looking tag. I made the tree with my sewing machine.

Close up of tag


Here is the scrapbook page of the gift wrapping idea. I bought storage boxes from London Drugs in three different sizes. I put wrapped gifts inside those boxes. I stacked them and tied twine to hold them together. I tied a knot with raffia and bought a primitive looking Christmas decoration to top it off.

Close up of gift
This isn't the greatest picture as I didn't focus in on the gift. This picture doesn't show how fabulous and impressive it was. I hope this idea gives you some inspiration.

Peanut Butter Blossoms


I like making these cookies any time of the year because they are reasonably easy to make, yet they look like a lot of effort is put into them. I added them to a Christmas goodie tray for my hubby to bring to the fire hall for a treat for the firefighters. They were a nice addition. Make sure to buy those Kisses after the holidays when they are on a good sale!

Peanut Butter Blossoms

1/2 cup shortening 1/2 cup peanut butter 1/2 cup white sugar

1/2 cup packed brown sugar 1 tsp baking powder 1/8 tsp baking soda

1 eggs 1 tsp vanilla 2 tbsp milk

1 3/4 cups flour granulated sugar milk chocolate kisses or stars

Preheat oven to 350 degrees F. In a large mixing bowl beat shortening and peanut butter with an electric mixer on med. to high speed for 30 seconds. Add sugars, baking powder, baking soda. Beat until combined. Beat in egg, milk and vanilla until combined. Beat in as much flour as you can with mixer. Stir in remaining flour. Shape into 1 inch balls. Roll balls in additional white sugar to coat. Place balls 2 inches apart on an ungreased cookie sheet. Bake for 10-12 minutes or until edges are firm and bottoms are light brown. Immediately press chocolate blossom into each cookies center. Transfer to wire rack and let cool.

Here is the recipe card


Tuesday, December 21, 2010

Christmas Gift Wrap/Tag Idea


I made some tags a while back. I am finally wrapping presents and I was able to use them.


To see this tag post to download these tags for free, click HERE.

Hot Chocolate/Coffee Christmas Cup Gift Idea


I saw a cute coffee cozy on a blog called My Favorite Things. Click HERE for her tutorial. I filled this cup with so many goodies that I had to tie the drink mix to the outside, but it looked good with that too. This is an awesome little hostess gift, or that little gift for the mail man or teacher, etc., etc.  The tutorial shows a Starbucks coffee cup, but I prefer covering cups that don't have liquid in them. The cups I used are made by Dixie and can be purchased at Walmart, Superstore, Safeway, etc.


There are so many possibilities that one can do with these coffee cup cozies and I look forward to trying some more styles next year.

Monday, December 20, 2010

Decorated Christmas Gift Bag


Oh my goodness! Only five days until Christmas. My house looks like what I picture Santa's workshop would look like. I might be doing two posts a day because I have lots of stuff to show you. I won't post some of the items I am working on until after Christmas because they are presents. I almost have all my presents ready - so I am getting into my favorite part of the gifts - the wrapping.

Here is an easy way to decorate a gift bag and use up some scrap paper while you are at it. Glue on a base paper to the front of the bag. Punch nine circles and adhere to bag. Add a label. I put "to you" but it would be cool to have the person's name on it. Tie on a ribbon. Adhere to bag. Add some coordinating tissue to the bag and you have a sweet gift bag!

Joy Christmas Card


I found the inspiration for this card on a blog called Just Give Me Stamps. She does beautiful work. My card is definitely toned down from hers, but this was my crack at it with the supplies I had.

I didn't have a snowman stamp that was similar to the one on the inspiration card so I went looking for free clip art. Isn't this snowman adorable? You can download this snowman and other clip art for free at Designed To a T website. Click HERE to check it out.


I printed out the Joy lettering with the snowman in the middle, and I also printed out another snowman. 
I cut out the extra snowman and put him over the other snowman with pop dots. I also chalked around the snowman with yellow chalk and added some sprinkles to give a snowflake effect. 

Sunday, December 19, 2010

Make Your Own Family Photo Christmas Card

It is easy to make your own family photo Christmas Card. Here is how I made mine:

1. Use the publishing program of your choice on your computer. I have a Mac. I use Keynote.

2. Choose a background color. I chose black. 

3. Insert a picture. I put a white border around my picture.

4. Type in a sentiment. The handwriting font I used is called Porcelain. I downloaded it for FREE. Find this font and other free Christmas fonts HERE.

5. Add clip art. I downloaded an awesome Christmas dingbat font called Winter Wonderland. This dingbat has the beautiful snowflake I used on my card and other wonderful Christmas clip arts. Actually, I downloaded quite a few dingbats from this particular site. Check it out HERE.

6. After I was happy with how everything looked, I clicked on File and then export. I clicked on the images button, made sure it said JPEG file, and saved it to my iphoto. In iphoto I cropped it to constrain it to a 4x6, but you can choose whatever.

7. Now I will transfer it to a jump drive and print it out at Superstore ( Walmart photo is way too busy at this time of year ).


Saturday, December 18, 2010

It's the Most Wonderful Time of the Year - Christmas Card with Homemade Envelope


I saw a card like this and loved it. I did not have the stamp, but I did not let that stop me. I went on the hunt for clip art and I found these mittens on the Scholastic Printables site. They have all sorts of cute FREE clipart available like the skates, sled and holly below. Click HERE to check out more of their clip art.


After finding awesome free clipart,  I went to work making my sentiment for the card. I wish when I saved this card idea that I bookmarked whose artwork it was - but that was way back when. I will not put the picture of inspiration on my blog as I don't know who to give the credit to.

I made the card out of a 4" x 9" paper. This is the first time I have tried this size and I LOVE it. You get three cards from a 12x12. One of the issues I always have is with envelopes. I would love to make 6"x6" cards or 4 x 4 cards, but they are hard to find and when I do find them - really pricey. I made my own out of pop in lunch bags. I cut the bag a little longer than 4 1/2 inches with a decorative scissor. I punched a half circle in the middle so the bow would fit, and I stamped on a snowman. So cute and very frugal. You can get 50 envelopes this way for $1 or $1.25 depending where you shop.

Frugal Alternative - Pop in lunch bag for an envelope
With the pearls that are on the cards, I saw the greatest tip on another blog. Color white pearls the color you need. The pen that was used was a Copic pen. I DON'T HAVE those, so to make do with what I have, I used Sharpies. 

Frugal Alternative - Color your pearl stickers with a Sharpie


Thanks for looking!

Friday, December 17, 2010

No Paper Christmas Gift Wrap Idea


Run out of Christmas Wrap? No problem. Turn a box inside out, tie a nice ribbon around it, and you have an environmentally friendly packaged gift.


1. Find a box that has a nice brown or white inside.


2. Take apart the box, taking note of how it was put together. Turn the box inside out, folding everything the opposite way.


3. Put the box together, applying hot glue where needed.


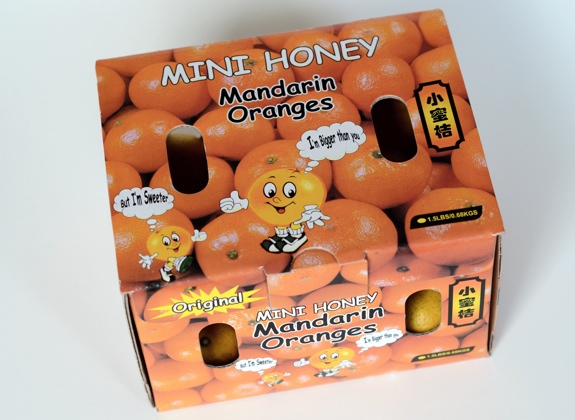
Don't have hot glue? Try taking a mandarin orange box apart, turn it inside out and put it back together. You don't need glue for those boxes. The only problem with those boxes is they have holes in them so you need to conceal the gift in tissue paper.

Thursday, December 16, 2010

Merry and Bright Christmas Card


I seen a card that had the saying "Merry and Bright" and it used bright yellow paper. I was so excited to  have an opportunity to use up some of my overstocked bright yellow.


I embossed the paper with my new cuttlebug embossing folder, Kassie's Brocade. I embossed the stocking as well. I tried a navy cardstock, and sanded it to bring out the white.


I also tried a white cardstock and inked it with navy blue. It is fun to try different versions of the same card.

Wednesday, December 15, 2010

Santa's Long Underwear - Funny Treat Bag Tutorial


Here is a funny treat bag idea. It is so simple to make.

1. Download, print and cut out Santa Underwear Pattern from red felt.

Santa's Underwear Pattern

Make sure you have two long underwear pieces and one flap.


2. Fold one of the underwear pieces in half. Cut a slit half way between the top of the legs and the underarm, making sure to leave an inch and a half or more on each side. This is where the goodies will be put in.


3. Pin the flap an inch or so above the cut opening. Sew on the flap.
This is the back.


4. Pin front and back together, wrong sides together. Sew the whole way around, following fairly close around the edges, but making sure the fabric is sewn together.


5. Glue on pom poms or buttons to the front.


6. Glue on two buttons/pom poms on the back.


7. Cut a 15" piece of thin wire. Poke both ends through the top of the garment.
If your wire is a little thick, it might take a bit of work to get the wire through.


8. Wrap the ends of the wire around a pencil to make it spiral. With needle nose Pliers, tuck the end of the wire in the spiral so it isn't poking out. On the right side, add the tag (see at bottom of tutorial) before you spiral the wire. On the round part of the wire, make a couple spirals as well.


9. Add treats!


Santas Underwear